零成本建站实战:把 .si 域名部署到 Cloudflare Pages
This is fusi.si's own build log — from a freshly registered domain to a live site, at zero cost. You can follow the exact same steps.
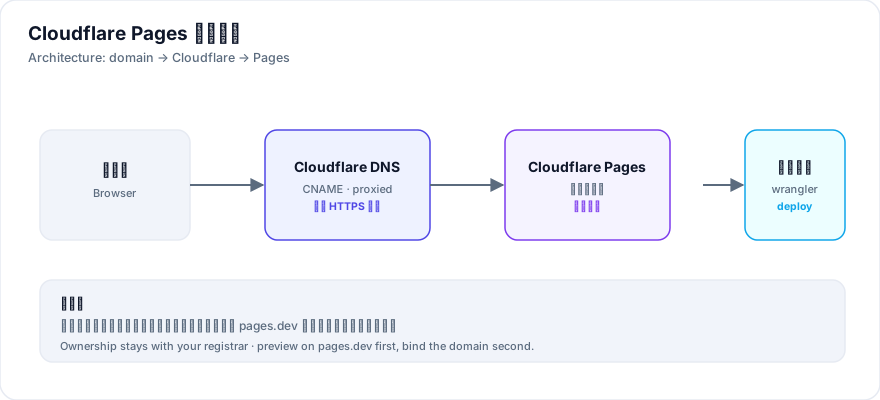
Architecture & cost
Our stack is minimal: pure static HTML/CSS/JS, no backend, no database, hosted on Cloudflare Pages' free tier. A domain is the only cost.
- Cloudflare Pages(免费,含免费 HTTPS)
- 任意注册商(本例为 .si)
- 本地文件夹 + 一个部署命令
Step 1: point NS to Cloudflare
After adding the site in Cloudflare, you get two nameservers. Replace your registrar's defaults with them.
Propagation can take minutes to 48 hours. Confirm via registrar WHOIS that the new NS shows up.
Step 2: upload the site
- Cloudflare 控制台 Pages → Create → Upload assets,直接拖文件夹,最省事
- 用 wrangler 一键部署,适合频繁更新
Step 3: custom domain & HTTPS
Add your domain under Custom domains; Cloudflare creates the CNAME and issues HTTPS automatically once NS is switched.
Common pitfalls
- 记录可能没写全,等区域 active 后删掉重新添加即可
- HTTP 200 不代表内容对,可能命中旧缓存,要看实际返回的标题
Wrap-up
Under an hour, zero cost. Domain ownership stays with your registrar, so you can move hosting any time.
Command-line deploy details
For frequent updates, the CLI is faster. One command does it:
CLOUDFLARE_API_TOKEN=你的令牌 CLOUDFLARE_ACCOUNT_ID=你的账户ID \
wrangler pages deploy ./你的目录 --project-name=项目名- Token scope:需
Cloudflare Pages: Edit;要连带改 DNS 再加DNS: Edit。 - Account vs user token:验证端点不同,账户级令牌要用账户路径校验。
- Preview URL:每次部署会生成一个 hash 地址,可用于回滚前预览。
Preview first, domain second
Order matters: get pages.dev working first, then bind the custom domain. Binding depends on NS already pointing to Cloudflare; otherwise it stays pending.
The pending-zone pitfall
Binding a custom domain while the zone is still pending can leave DNS records unwritten. Fix: once the zone is active, delete and re-add the custom domain.
Free tier & notes
- Free tier suffices:静态站带宽与构建次数对个人站完全够。
- Automatic HTTPS:证书自动签发与续期,无需手动管。
- Ownership stays put:域名在注册商,换托管不影响所有权。
Real case: the real cost of a content site
This site is the case: pure static HTML/CSS/JS on Cloudflare Pages free tier, zero hosting cost, ~1 hour from registration to a live site (excluding content), and HTTPS was fully automatic once the custom domain was bound.
- Only cost:域名年费。托管、CDN、HTTPS 证书全部由免费档覆盖。
- Ownership safe:域名始终在注册商,Cloudflare 只是托管层,随时可迁移。